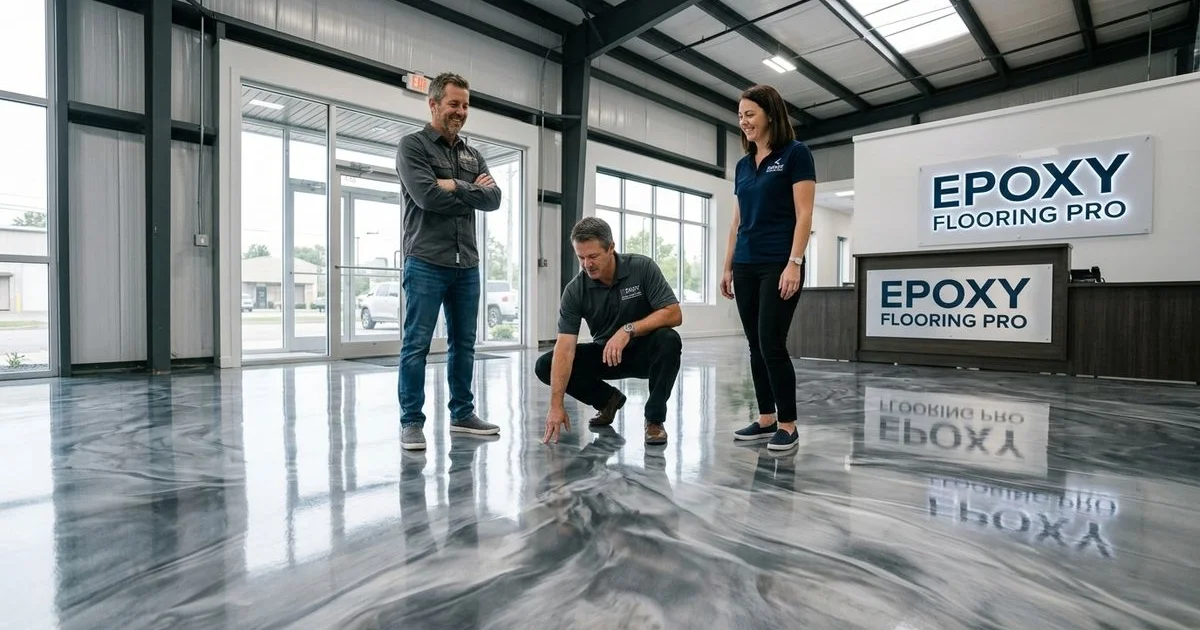
You know how frustrating it is when a heavily trafficked warehouse or manufacturing floor starts dusting and wearing down just a few years after installation. We see this issue constantly in food and beverage plants across the US. The solution often isn’t adding another layer of coating, but rather executing The Concrete Polishing Process: From Raw Slab to Mirror Finish in 7 Steps.
Polished concrete mechanically refines your existing floor through progressive diamond grinding and honing steps.
Our team at Epoxy Flooring Pro relies on this method to achieve exceptional sheen, clarity, and hardness. This approach physically changes the concrete structure instead of just covering it up. We will break down the exact seven phases required to transform a rough slab into a highly durable surface, exploring the latest 2026 data behind each phase.
Step 1: Floor Assessment and Preparation
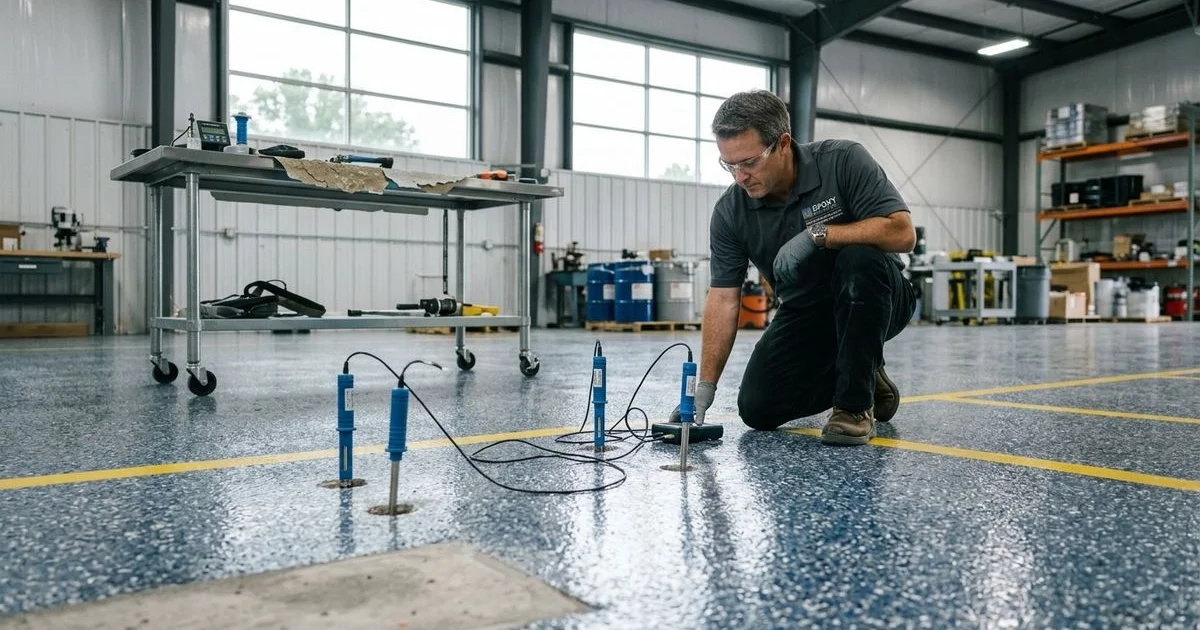
Before any grinding begins, the concrete must be thoroughly assessed for condition, composition, and defects. We evaluate these factors to determine the starting grit, the number of passes required, and whether any repairs are needed before polishing begins.
Initial Slab Evaluation
Key assessment factors include:
- Concrete hardness: Measured with a Mohs hardness scratch test according to ASTM C1790-16 or ASTM C1895-20 standards.
- Surface condition: Existing coatings, adhesives, paint, or sealers must be removed entirely through proper concrete surface preparation.
- Flatness: Significant floor levelness issues may require additional grinding to achieve uniform aggregate exposure across the slab.
Our crews use the Mohs test to set minimum contractual benchmarks for the completed surface. A minimum specification for a successfully refined commercial floor is safely set at 7 Mohs. Natural concrete can sometimes achieve up to 8 or 9 Mohs depending on the regional aggregate mix.
Soft concrete (Mohs 3-4) requires completely different metal-bonded tooling than hard concrete (Mohs 6-7). All repairs use cementitious patching compounds color-matched as closely as possible to the surrounding concrete. We inform clients upfront that epoxy-filled cracks and joints will appear differently in the finished floor than the surrounding concrete. Severe damage may require dedicated concrete & joint repair before polishing can begin.
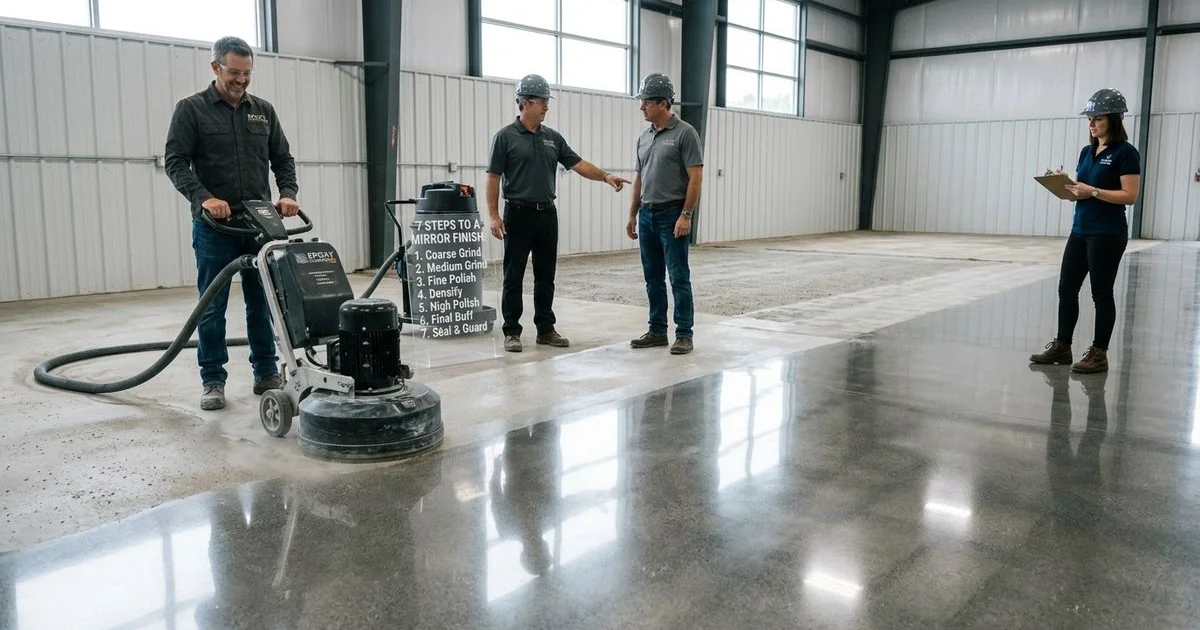
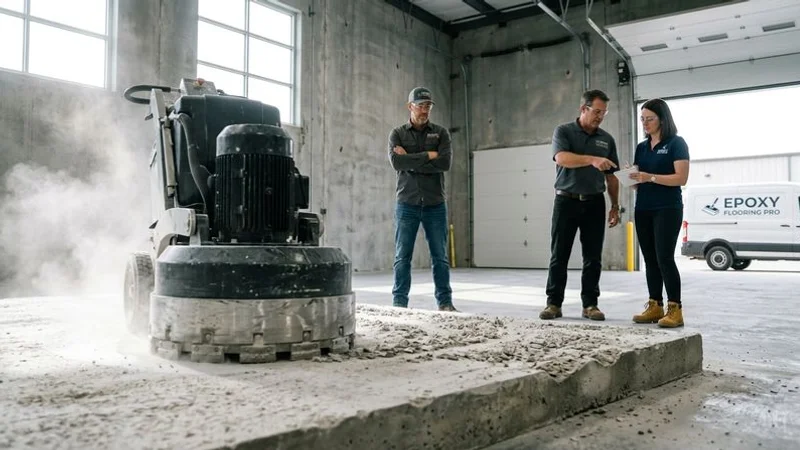
Step 2: Coarse Diamond Grinding
The polishing process begins with metal-bonded diamond tooling at grits ranging from 30 to 80, depending on the starting condition of the concrete. We use this coarse grinding phase to remove surface imperfections, laitance, and minor high spots while creating the initial surface profile.
For floors requiring significant material removal, the crew may make multiple passes at the coarsest grits before progressing. Each pass removes approximately 1/32 to 1/16 inch of material. This step produces the most dust and noise of any phase in the process.
Our industrial equipment uses integrated vacuum systems with true HEPA filtration to capture dust exactly at the point of generation. The updated 2025 OSHA Respirable Crystalline Silica Standard lowered the permissible exposure limit to just 25 µg/m³ averaged over an eight-hour shift. Compliance requires strict adherence to these wet cutting and advanced vacuuming protocols.
Step 3: Intermediate Grinding
After coarse grinding, the crew transitions to higher-grit metal-bonded diamonds, typically 100 to 200 grit. We execute this step to refine the scratch pattern left by coarse grinding and begin revealing the aggregate structure within the concrete.
The level of aggregate exposure is controlled by how much material is removed during these initial grinding steps. The Concrete Polishing Association of America (CPAA) classifies these finished exposure levels into four distinct categories.
CPAA Aggregate Exposure Classifications
| Class | Industry Name | Visual Appearance | Depth of Surface Cut |
|---|---|---|---|
| Class A | Cream Polish | Very little aggregate exposure, mostly cement paste. | Minimal surface removal. |
| Class B | Salt and Pepper | Fine aggregate exposure showing small sand particles. | Approx. 1/16 inch cut. |
| Class C | Medium Aggregate | Moderate exposure revealing medium-sized stone pieces. | Approx. 1/8 inch cut. |
| Class D | Full Aggregate | Deep grinding exposing large stone aggregate throughout. | Up to 1/4 inch cut. |
Most commercial polished concrete specifications call for a Class B or Class C exposure. We recommend these middle tiers because they provide a balanced aesthetic between the cement paste and the natural stone aggregate.
Step 4: Chemical Densification
Between the metal-bond grinding steps and the resin-bond honing steps, the concrete is treated with a liquid densifier. We exclusively utilize advanced lithium silicate densifiers for this critical stage.
This liquid chemical penetrates the concrete pore structure and reacts with free calcium hydroxide to form calcium silicate hydrate. This crystalline compound fills microscopic pores and dramatically increases the surface hardness.
The Science of Silicate Bonding
Many facility managers ask about the difference between colloidal silica and lithium silicate. We prefer lithium silicate because it offers distinct chemical advantages:
- Forms strong covalent bonds within the concrete matrix.
- Penetrates faster than colloidal alternatives.
- Provides long-term resistance against heavy forklift traffic.
Densification transforms ordinary concrete into a surface capable of taking and holding a polish. Without proper densification, the concrete surface remains too soft and porous to achieve high gloss levels, and the polish will wear off rapidly. Liquid densifiers are the industry standard for commercial applications, holding approximately 46.8% of the US densifier market in 2025 due to their fast penetration rates.
The densifier is applied liberally and kept wet on the surface for 15 to 30 minutes to allow maximum absorption. Our technicians remove any excess product before it dries to prevent a hazy white residue from forming.
Step 5: Resin-Bond Honing
After densification and a minimum 24-hour cure period, the crew switches from metal-bonded diamonds to resin-bonded diamond tooling. We use these softer, finer tools to produce the smooth, refined surface that characterizes polished concrete.
Honing progresses through grits of 100, 200, 400, and 800 resin-bond diamonds. Each step removes the scratch pattern from the previous grit while creating its own finer scratch pattern. The surface sheen increases visibly with each progressive pass.
Measuring Surface Clarity
At 400-grit resin, the floor achieves a satin sheen suitable for industrial and warehouse applications. We verify the quality of this finish using Distinctness of Image (DOI) measurements governed by the ASTM D5767 standard.
DOI measures the actual sharpness and clarity of a reflected image, whereas older gloss meters only measured the brightness of the reflection. The DOI scale ranges from 0 to 100, with a perfect mirror scoring 100. Progressing to 800-grit produces the medium gloss finish most commonly specified for retail, commercial, and institutional spaces.
Step 6: High-Gloss Polishing (Optional)
For specifications requiring maximum reflective clarity, the crew continues through 1,500-grit and 3,000-grit resin-bond diamonds. We apply these ultra-fine grits to produce a near-mirror finish with distinct reflections of overhead lighting, signage, and surrounding architecture.
High-gloss polished concrete is most commonly specified for retail environments, corporate lobbies, and automotive showrooms.
2026 Cost Considerations for High-Gloss Finishes
The additional time, labor, and tooling required for high-gloss polishing significantly impacts the project budget. We track concrete polishing prices closely, and 2026 data shows that a standard Level 2 satin commercial finish typically ranges from $7 to $11 per square foot. Upgrading to a Level 4 showroom gloss finish with maximum reflection pushes the total installed cost to a range of $12 to $18 or more per square foot.
“Investing in a Level 4 finish requires a pristine concrete canvas, as the intense reflection will highlight any underlying imperfections in the slab.”

Step 7: Guard Application
The final step is applying a stain-resistant guard or sealer to the polished surface. Our crews use this topical treatment to fill any remaining microscopic pores and provide a sacrificial barrier against staining from spills, foot traffic, and routine wear.
Guards are available in two primary categories:
- Penetrating guards: These solutions absorb into the concrete and provide invisible protection without altering the surface appearance or the dynamic coefficient of friction.
- Topical guards: These products form a thin film on the surface that enhances gloss and provides maximum stain resistance.
Most commercial specifications call for penetrating guards because they do not build up over time and do not require chemical stripping before reapplication. We often specify premium penetrating products like PROSOCO PolishGuard for interior spaces. Penetrating sealers have become the preferred choice for industrial facilities, capturing 41.6% of the 2025 market share due to their low maintenance requirements.
Timeline and What to Expect
A typical polished concrete project progresses at 500 to 1,500 square feet per day per machine, depending on concrete hardness, desired finish level, and the amount of repair work required. We find that a 10,000-square-foot commercial space typically requires 5 to 10 working days from start to completion.
The process generates moderate noise levels and minimal dust when proper HEPA vacuum equipment is utilized. Areas adjacent to the work zone can typically remain occupied, though sensitive electronics and food service operations may need temporary plastic barrier protection.
Understanding The Concrete Polishing Process: From Raw Slab to Mirror Finish in 7 Steps ensures you get the right results for your facility. We can help you plan the project and answer any specific questions. Learn more about our polished concrete services or schedule a consultation with our team to discuss your project specifications.
Need Help With Your Floor Coating Project?
Our project managers provide free on-site assessments tailored to your facility.
Get a Free Estimate